Denim Destroy Pattern Making Process: 3 Easy Steps
Introduction
Denim destroy is a popular denim dry process. It creates distressed effects on jeans. This article outlines denim destroy pattern-making techniques in 3 easy steps. Destroy produces worn-out areas, broken threads, and holes. It makes fashionable appearances. Destroy effects may depend on the buyer’s standards or requirements. In a denim washing factory, buyers often provide a standard sample. Factory copy the destroy design and replace on the denim garments. However, this article briefs how to copy a denim destroy pattern from a buyer’s standard sample in 3 steps.
Read more: Ozone Technology in Denim Washing Industry: Easy Mechanism
Destroy Applied Area
Basically, the denim dry process is applied to jeans to create a vintage look. Destroy is a famous denim dry process among the young generation. A denim destroy effect is a distressed finish created by removing selected yarns. The destroy effect is commonly applied to jeans to achieve a vintage or distressed appearance. The following are areas where destroy can be placed:
- The thighs
- Knees
- Pockets
- Lower legs
The final appearance of the destroy design depends on the buyer’s requirements, denim fabric construction, as well as the operator’s skill
Read more: Garment Dyeing Process: Explained Advantages & Disadvantages
Tools and Materials Required
The following tools are required to copy the denim destroy pattern from a buyer’s standard.
- Buyer’s standard denim sample
- Rubber board
- Pins
- Packaging tape
- Hard paper
- Marker
- Cutter
- Pen-type denim destroy machine
- Air gun connected to a suitable compressed air supply
Denim Destroy Pattern Making Process
The complete pattern-making process can be divided into 3 steps
- Step 1: Copying the Destroy Pattern From the Buyer’s Standard Sample
- Step 2: Drawing the destroy design using the pattern.
- Step 3: Creating the destroy effect on the denim garment.
Now, let’s learn the denim destroy pattern making process step by step.
Step 1: Copying the Destroy Pattern From the Buyer’s Standard Sample
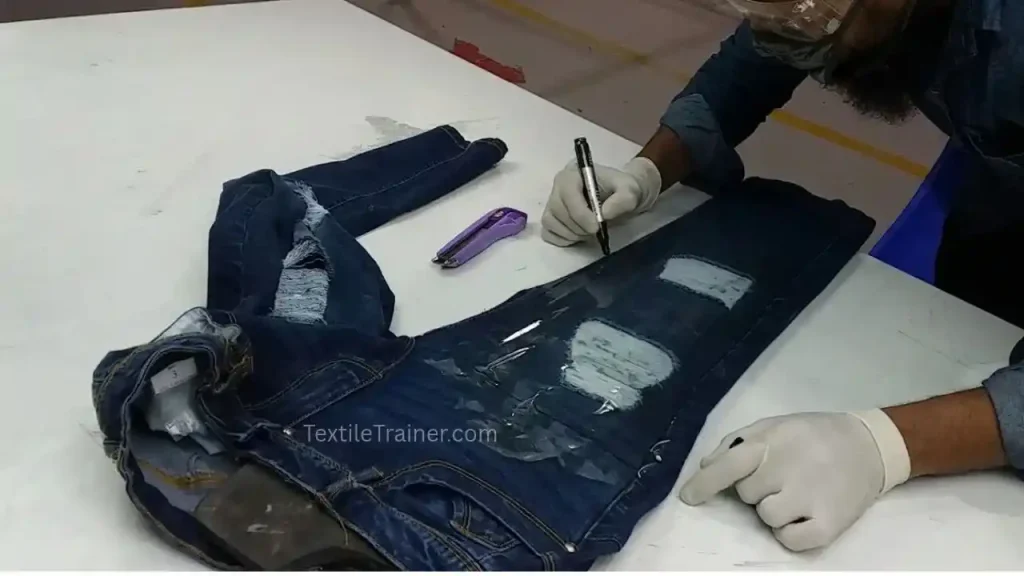
- Initially, insert a rubber board inside the standard denim garment. This rubber board provides support during pattern sketching.
- Then, use pins to hold the garment securely to the rubber board.
- Now, apply packaging tape over the distressed area of the jeans.
- Subsequently, carefully trace the distressed design lines on the tape using a marker.
- After completing the drawing, carefully remove the tape from the denim garment.
- Now, place the tape on the hard paper.
- Then, cut the paper along the marked lines using a cutter.
- Finally, the destroy pattern is ready.
Step 2: Drawing the Destroy Design Using the Pattern
After preparing the pattern, the next step is to transfer the design to a new garment.
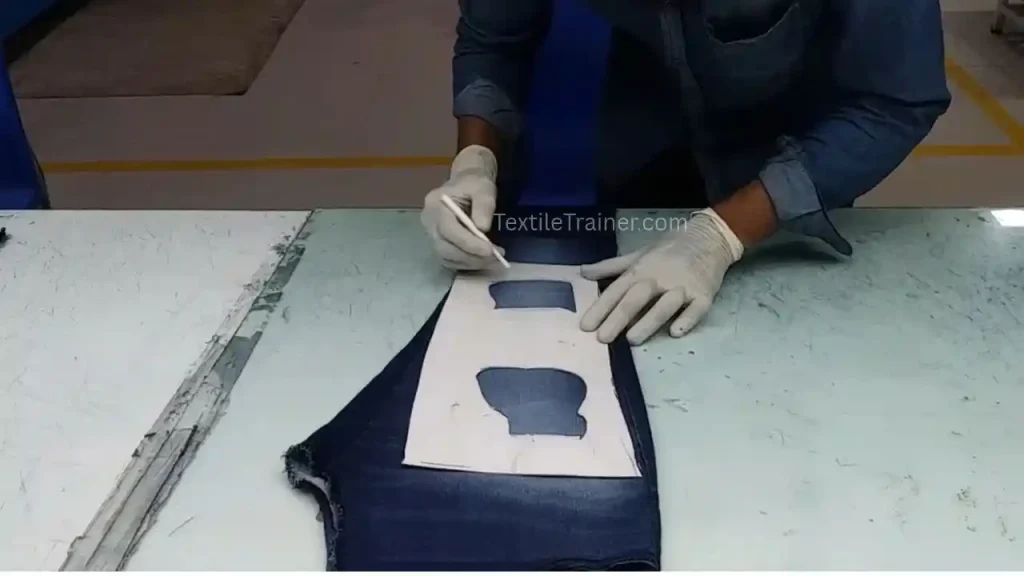
- At first, place the prepared destroy pattern on a new garment.
- Now, trace the destroy design onto the denim garment using the pattern.
- Before proceeding, check the position, size, shape, and direction of the marked design against the buyer’s standard sample.
Step 3: Creating the Destroy Effect on the Denim Garment.
The final step is to create the distressed effect on jeans using a pen-type denim destroy machine.
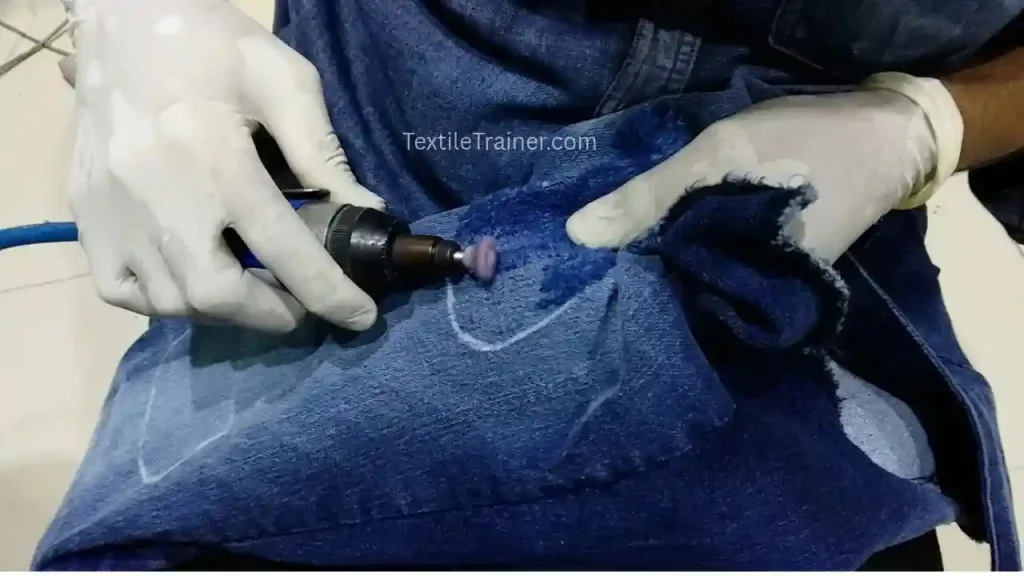
- Initially, prepare the pen-type denim destroy machine.
- Now, carefully operate the machine along the marked lines. The denim destroy machine breaks the weft thread of the denim fabric.
- Note: The operator must control the working depth and movement to avoid damaging more fabric than the buyer’s design requires.
- After completing the destroy effect, air is applied to remove the broken threads from the worked areas.
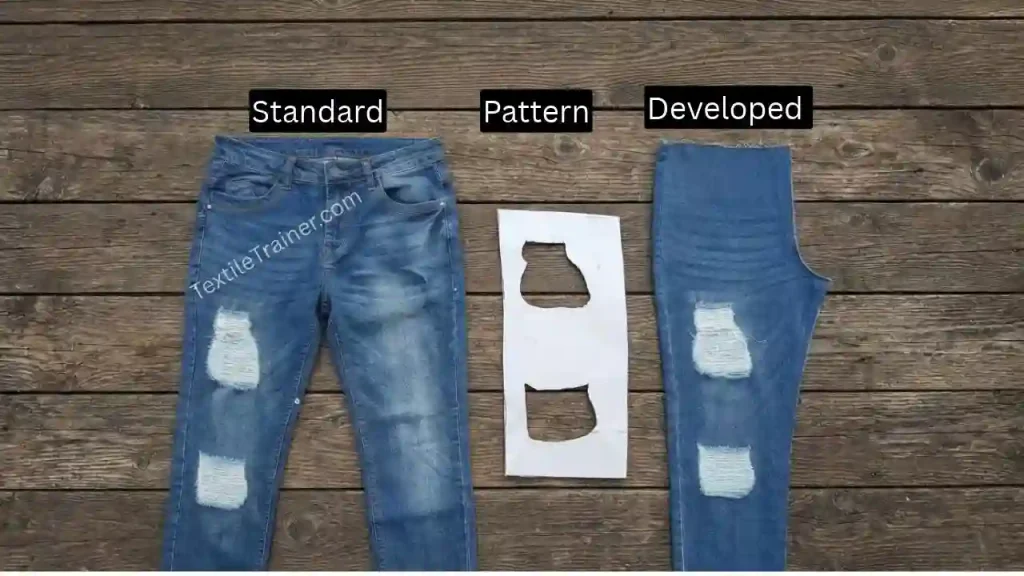
- Finally, compare the finished garment with the buyer’s standard sample.
Final Outlook of Denim Destroy Pattern
Quality Control Points for Denim Destroying
Quality control is essential when copying a pattern. The following points should be checked carefully:
- Denim destroy pattern accuracy.
- Position accuracy.
- Size and shape.
- Fabric damage.
- Appearance consistency.
Conclusion
To cut the long story in short, copying a denim destroy pattern from a buyer’s standard helps maintain design accuracy during denim finishing. The process involves three main steps: preparing the pattern from the standard sample, transferring the design to a new garment, and creating the destroy effect with a pen-type denim destroy machine. Most of the denim washing industry follows this process. This process is simple. However, if you have any questions about the denim destroy pattern making process, let me know in the comments box below.