Apparel Analysis : Easy 7 Steps of Polo Shirt Analysis
What is Apparel Analysis???
The apparel analysis process where systematic analysis of garments and clothing to meet the buyer’s requirements and on-time shipment. The apparel analysis process performed in this manner is totally visual analysis based and sometimes augmented visual analysis by the merchandiser is performed. This can be used for the initial sample development process. In this article, I will discuss 7 steps of apparel analysis with example.
7 Steps of Apparel Analysis with Example in the Garments Industry
7 steps are involved in apparel analysis in the garment industry. They are:
- Step 1: Style description.
- Step 2: Positioning strategy.
- Step 3: Sizing and fit
- Step 4: Material selection.
- Step 5: Component assembly.
- Step 6: Final assembly and finishing.
- Step 7: Style presentation.
Now, I will discuss all 7 steps of apparel analysis with an example. Let’s consider we got a polo shirt from the buyer. We will analyze this polo shirt according to the apparel analysis process.
You may read: Sewing Thread Consumption Shortcut Easy Formula with 5 Exercise
Step 1: Style Description
Apparel Analysis Report for Style No: TT#1250
- Brand Name: Textile Trainer
- Merchandise Group: Summer Wear
- Style Number: TT#1250
- Theme: Strips knitted fabric
- Selling period: Summer 2025
- Body Type: Male
- Size range: 10-16
- Sample size: 5
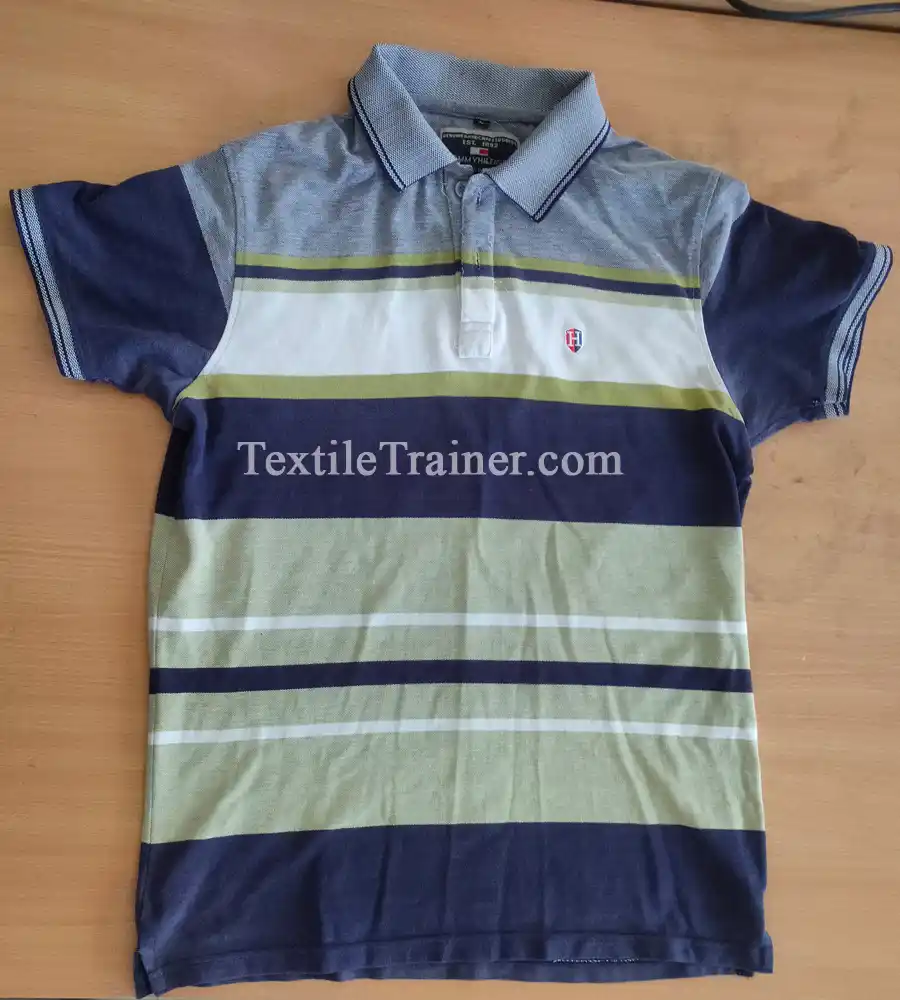
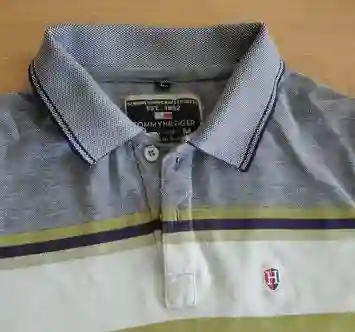
- Verbal description of the garment: A half sleeve polo shirt with yarn dyed strips. Convertible collar, no pocket, embroidery logo at left chest.
- Date of Approval: ………………………………..
- Approved By: ………………………………
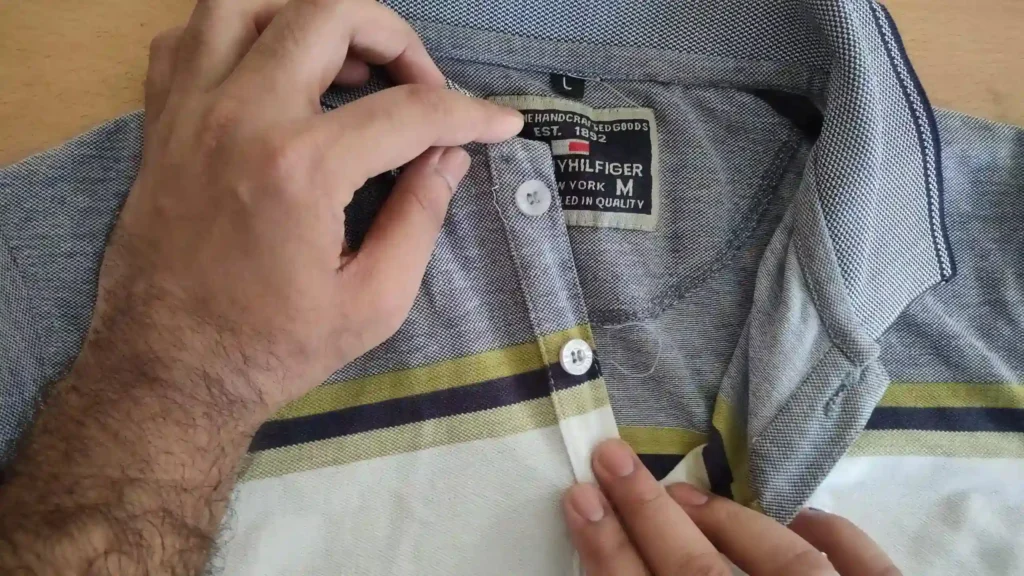
- Trims used: Size label, buttons, embroidery logo Fabric: Double jersey strips knitted fabric ( yarn dyed)
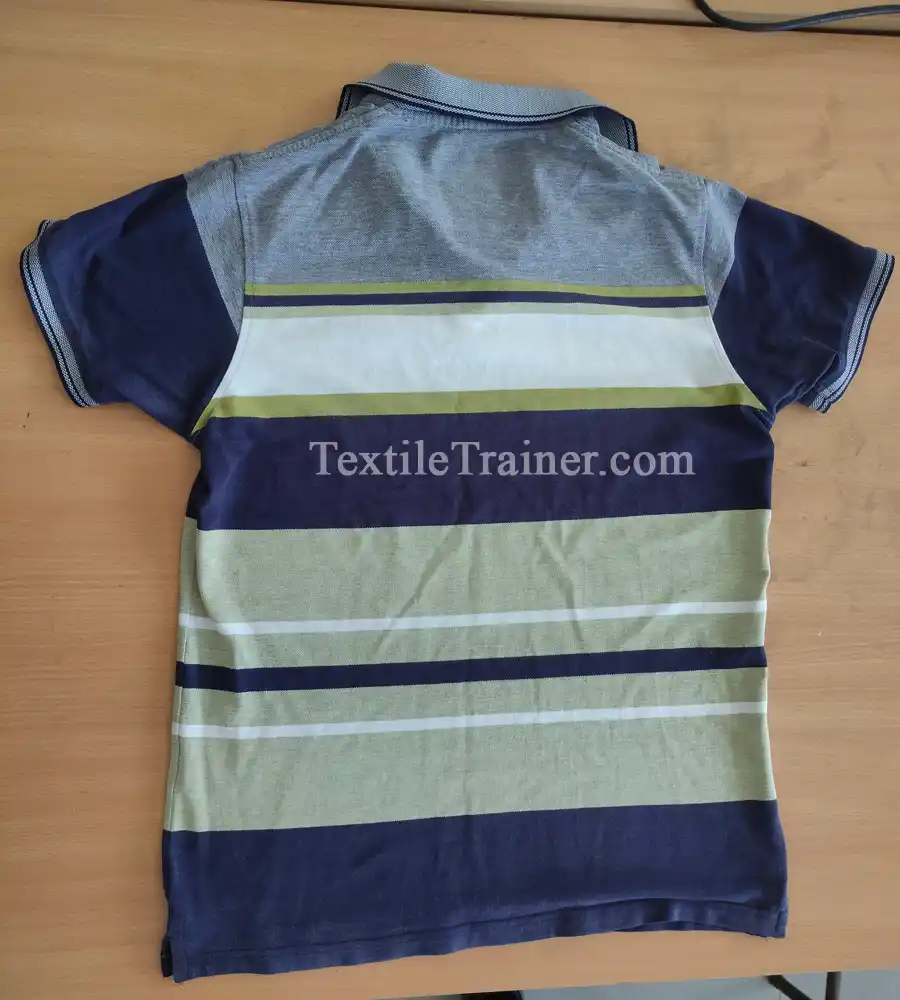
Detailed Picture of the Garment:
Measurement details (cm):
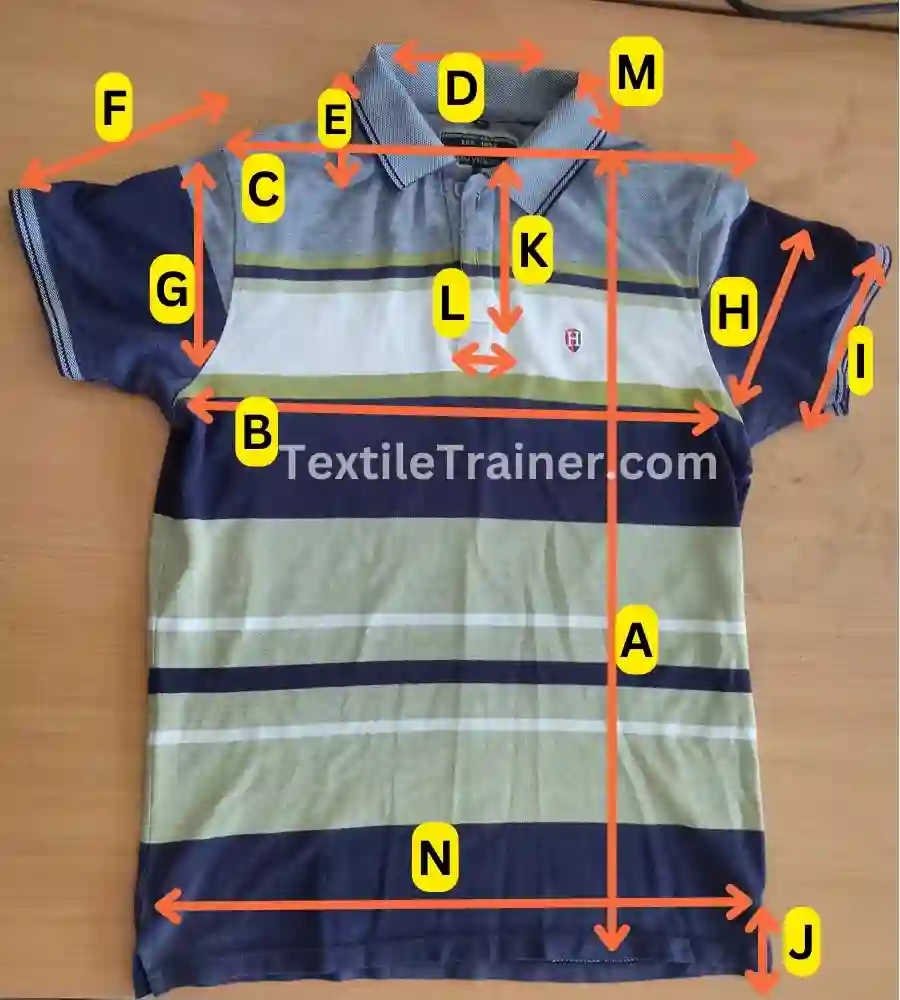
| Full length (A) = 70 | Upper arm width(H)=20 |
| Half chest(B)=50 | Sleeve open(I) =9 |
| Shoulder width(C)= 40 | Slit length(J)= 4 |
| Neck width (D)= 20 | Placket length(K)=15 |
| Front neck depth (E) = 15 | Placket width(L)= 2.5 |
| Sleeve length(F)= 18 | Collar width(M)= 6 |
| Arm hole (G)= 25 | Bottom width(N)=52 |
Step 2: Positioning strategy
- Functional 5 4 3 2 1 0 1 2 3 4 5 Aesthetic
- Durable 5 4 3 2 1 0 1 2 3 4 5 Disposable
- Intrinsic cues 5 4 3 2 1 0 1 2 3 4 5 Extrinsic cues
- Basic styling 5 4 3 2 1 0 1 2 3 4 5 Fashionable
- Basic price 5 4 3 2 1 0 1 2 3 4 5 Better price
Step 3: Fit indicators
- Gender: male
- Height: 70 cm
- Circumference: 100 cm
- Weight range: 60-70 kg
- Size indicator: medium
- Collar length: 25 cm Sleeve length:18 cm
- Chest circumference: 100 cm
- Silhouette:
- Closeness to the body: Moderate
- Amount of fabric stretch: Moderate
- Fit level: height: medium, circumference: slim
Step 4: Material selection
Fabric specification
| Body part | Collar | |
| Material name | Cotton, double jersey knitted fabric (Strip) | 2/2 Rib |
| Vendor | XYZ industry | XYZ industry |
| Vendor location | Gazipur, Bangladesh | Gazipur, Bangladesh |
| Color | Black, white, olive, blue | Black white |
| Fiber content | 100% cotton | 100% cotton |
| GSM | 250 | 170 |
| Finishes | Compacting |
Trims details
- Material name: Size label
- Vendor: ABC Inc.
- Vendor location: Gazipur, Bangladesh
- Color: Black
- Content: polyester
- Size: 2.5× 1 cm
- Material name: button
- Vendor: ABC Inc.
- Vendor location: Gazipur, Bangladesh
- Color: White
- Content: Synthetic
- Size: 2.5× 1 cm
- Material name: Twill tape
- Vendor: ZX Inc.
- Vendor location: Gazipur, Banaglesh
- Color: Navy blue
- Content: Polyester
- Size: 4× 0.85 cm
Step 5: Garment component assembly

Operation sequence
- Operation 1: Placket preparation
- SPI/Stitch type: 12/ lock stich (301)
- Machine type: single needle lock stitch machine
- Operation 2: placket attaching
- SPI/Stitch type: 12/ lock stich (301)
- Machine type: single needle lock stitch machine
- Operation 3: Rib join in Sleeve
- SPI/Stitch type: 12/ chain stitch (503)
- Machine type: Overlock machine machine
- Operation 4: Bottom hem
- SPI/Stitch type: 18/ top stitch (605)
- Machine type: Flat lock machine
- Operation 5: Twill tape preparation
- SPI/Stich type: 12/chain stitch (503)
- Machine type: Overlock machine machine
Step 6: Final assembly and finishing
- Operation 1: Shoulder attach
- SPI/Stitch type: 16/ cover stitch (504)
- Machine type: Overlock machine
- Operation 2 : Collar preparation
- SPI/Stitch type: 12/ lock stitch (504)
- Machine type: Single needle lock stitch machine
- Operation 3 : Shoulder top stitch
- SPI/Stitch type: 18/ top stitch (604)
- Machine type: flat lock machine
- Operation 4: Collar attach
- SPI/Stitch type: 16/ cover stitch (504)
- Machine type: Overlock machine
- Operation 5: Collar finishing and top stitch
- SPI/Stitch type: 12/ cover stitch (301)
- Machine type: Single needle lock stitch machine
- Operation 6: Sleeve attach
- SPI/Stitch type: 16/ cover stitch (504)
- Machine type: Overlock machine
- Operation 7: Top stitch on armhole
- SPI/Stitch type: 18/ top stitch (602)
- Machine type: Flat lock machine
- Operation 8: Side seam
- SPI/Stitch type: 16/ cover stitch (504)
- Machine type: Overlock machine
- Operation 9: Twill tap attach at slit
- SPI/Stitch type: 12/lock stitch (301)
- Machine type: Single needle lock stitch machine
- Operation 10 : Sleeve tack
- SPI/Stitch type: 12/lock stitch (301)
- Machine type: Single needle lock sttich machine
- Operation 11: Bar tack at slit
- SPI/Stitch type: Bar tack
- Machine type: Bar tack machine
- Operation 12: Size label attach at neck
- SPI/Stitch type: 12/lock stitch (301)
- Machine type: Single needle lock stitch machine
Analysis of finished garment:
- Colour shading: matched
- Consistency in stitches and seams: uniform
- Strips matching at side seam: matched
- Overall appearance: excellent
Step 7: Garment packing information
- Brand label: None
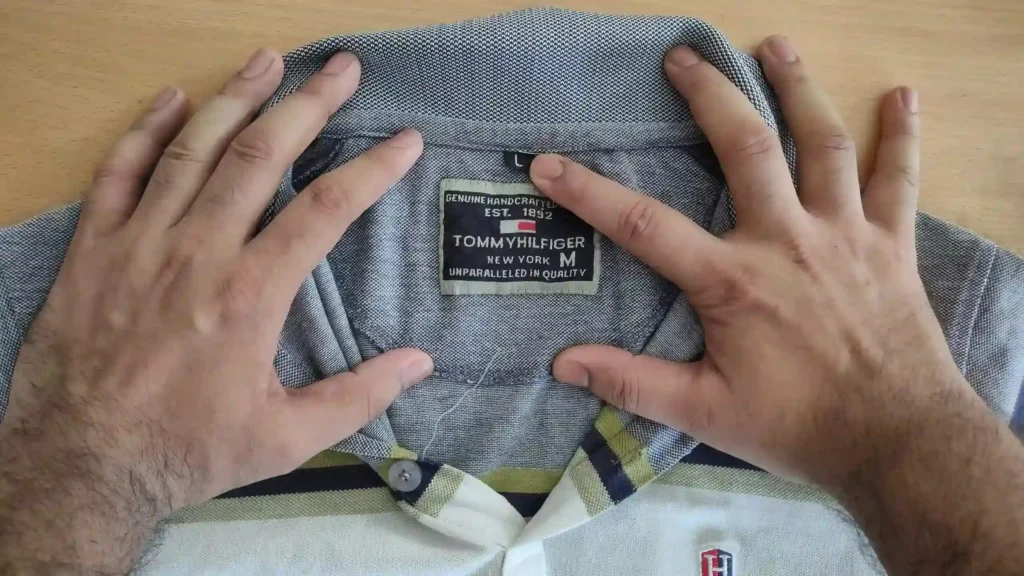
- Size label: types: woven
- Fiber content label: none
- Country of origin label: none
- Care instruction label: none
- Display device: folded and packed in poly bag individually
- Bag: self-adhesive polybag
- Hang tag information: none
Conclusion:
Apparel analysis reports in garment industry will give correct and reproducible data about various raw materials of garment. 7 Step of Apparel analysis also will help to make tech sheet. I tried to best to present apparel analysis with example simply.
You may read:
- Study on Industrial sewing machines: A Comprehensive Guide to Types and Application in Apparel Manufacturing
- Study on Dynamic Anatomy of Sewing Needle Used in Garments Manufacturing
- Study on the general concepts of different fusing technique to Ignite Your Skill
- Study on the mechanism of lockstitch formation with dynamic Image
- Study on Different Types of Stitches Used in Garments for Unparalleled Craftsmanship
- Study on Trimmings and Accessories: Mastery and Ignite Your garments with Style and Flair
Reference:
- Belal, P. D. (2016). Understanding Textiles for a Merchandiser. Dhaka: L.B Graphics and Pringing.
- Corbman, B. P. (1987). Textile Fiber to Fabric. Singapore: McGraw Hill Book Co.
- Kadolph, S. J. (2006). Textiles. New Delhi: Pearson Education.
- R. Rathinamoorthy, R. S. (2018). Apparel Merchandising. Chennai: Woodhead Publishing India Pvt. Ltd.